Tuesday, July 31, 2012

Birthday Geisha's

Hello everyone and welcome.  I hope you enjoyed last week's Christmas In July blog hop by Mark's Finest Papers, a Heinrich Company.  Today I am sharing a card I made for Susan's (aka Rainy) monthly sketch challenge.  I actually finished the card last week, however, thanks to my migraines, it's taken four days to finally upload.

I started out by stamping my image from Asian Delights in memento tuxedo black ink onto snow storm heavy before coloring with prismacolor markers.  Once my coloring was finished, I layered the geisha's onto strawberry freeze card stock and basic grey kioshi designer paper before stippling Tim Holtz tumbled glass distress ink.

After I sponged some Stampin Up! blushing bride ink around the edges of the card, and added a die cut basic grey panel, I added some sheer organdy ribbon, pearl stickers, and then the main image panel with some pearl heart brads.

Thanks for stopping by today.  Have a great day.

Stamps: MFP Asian Delights
Ink: Memento Tuxedo Black, Stampin Up! Blushing Bride, Tim Holtz Tumbled Glass
Card Stock: MFP Snow Storm Heavy, Stampin Up! Blushing Bride, Basic Grey Kioshi Designer Paper
Accessories: Prismacolor Markers, Dimensionals, Pearl Stickers, Pearl Heart Brads, Sponge, Stipple Brush, Ribbon

Friday, July 27, 2012

Altered Glass Block - Christmas In July Blog Hop


Welcome to Mark’s Finest Papers, a Heinrich Company’s Christmas in July blog hop!  We are so glad that you joined us.  We hope that you will enjoy the tutorial each day and the projects on each of the blogs.  The blog hop will run 23-29 July, with a new tutorial and project each day of the hop.  Please note, if you are not a member of Speedy TV you will need to join the site before you can view the tutorials.  Joining is quick, easy and FREE, just click the tutorial link below and it will take you right to the home page where you can join.  The sign up button is on the right hand side of the page.

    Monday July 23rd —Christmas Cards in a Gift Box
    Tuesday July 24th —Stocking Stuffers
    Wednesday July 25th—Gift Bag
    Thursday July 26th—Gift Card Holder
    Friday July 27th —Ornament with Shrinky Dink
    Saturday July 28th —Glass Block
    Sunday July 29th —Decorated Tissue Box

Below are the designers participating in the hop. Some may have a tutorial or project each day, and some may not.


My project today is an altered glass block that can be found at any Hobby Lobby store, drilled with a small glass bit, and then put a small strand of lights inside for an unique, however personalized, decoration.

Since I was using one of the pre-drilled glass blocks, I started out by sponging white acrylic paint onto the block and then stamping images from the Little Church mini and New Pines stamp sets in pallet noir and pallet burnt umber before setting the inks with an heat embossing tool.  Once the ink was set, I cut up some sponges and lightly sponged Tim Holtz forest moss, pine needles, and brushed corduroy distress inks.  Once I was satisfied with the ink coverage, I took a couple of Stampin Up! markers and dabbed the colors into the church windows and roof.  My final touch was to add a recycled red/green/gold ribbon from a past Christmas and tie it into a bow.

Here's a another look at the finished block, only with the added inside lights plugged in.

Thanks for stopping by today.  Have a great day and don't forget to stop by the rest of the design teams blogs to leave some love.

Stamps: MFP New Pines, Little Church Mini
Ink: Pallet Noir, Pallet Burnt Umber, Tim Holtz Pine Needles, Brushed Corduroy, Forest Moss Distress Inks
Accessories: Hobby Lobby Glass Block, Christmas Light Strand, Ribbon, Sponges, Acrylic Paint,

Tuesday, July 24, 2012

Gift Bags - Christmas In July Blog Hop

Welcome to Mark’s Finest Papers, a Heinrich Company’s Christmas in July blog hop!  We are so glad that you joined us.  We hope that you will enjoy the tutorial each day and the projects on each of the blogs.  The blog hop will run 23-29 July, with a new tutorial and project each day of the hop.  Please note, if you are not a member of Speedy TV you will need to join the site before you can view the tutorials.  Joining is quick, easy and FREE, just click the tutorial link below and it will take you right to the home page where you can join.  The sign up button is on the right hand side of the page.

    Monday July 23rd —Christmas Cards in a Gift Box
    Tuesday July 24th —Stocking Stuffers
    Wednesday July 25th—Gift Bag
    Thursday July 26th—Gift Card Holder
    Friday July 27th —Ornament with Shrinky Dink
    Saturday July 28th —Glass Block
    Sunday July 29th —Decorated Tissue Box

Below are the designers participating in the hop. Some may have a tutorial, or project, each day and some may not.


One of the best things about being crafty is saving money by making my own gift bags to use.  Today I am sharing with you an easy project using Tim Holtz carved ornaments die, Christmas Cardinals stamp set, designer paper, and some yummy ribbon.

I started out by die cutting some Mark's Finest Papers, a Heinrich Company snow storm smooth heavy card stock using my Tim Holtz carved ornaments before stamping the images from the Christmas Cardinals and colored with prismacolor markers.  Once all of my coloring was finished, I pulled out some red/green plaid designer paper from my stash, cut it to size, and adhered it to my gift bag using some scor-tape.  (TIP: I highly recommend using scor-tape or something just as strong since the bags handles will cause any other adhesive to "give way".)  After I was finished adhering the designer paper, I added my cardinal ornaments using the same scor-tape, and then added some pre-made ribbon bows left over from last year from Wal-Mart.  A die cut poinsettia embellishes the top left corner for a little extra "something".  My final touch was to add a die cut tag with a thin strip of ripened tomato satin ribbon along with some Michael's $1 bin white/silver organdy ribbon after stamping a cardinal on the tag using Tim Holtz fired brick distress ink and edged with pine needles distress ink.

Here's a close up of some of the details.

Thanks for stopping by today.  Have a great day and don't forget to stop by the rest of the designers blogs to leave some love.

Stamps: MFP Christmas Cardinals
Ink: Memento Tuxedo Black, Tim Holtz Fired Brick, Pine Needles
Card Stock: MFP Snow Storm Smooth Heavy, Designer Paper
Accessories: Gift Bag, Prismacolor Markers, Big Shot, Tim Holtz Carved Ornaments Die, Scor-Tape, Spellbinders Poinsettia Dies, Glue Dots, Ribbon, Gift Tag, Black Marker

Monday, July 23, 2012

Stocking Stuffers - Christmas in July Blog Hop

Welcome to Mark’s Finest Papers, a Heinrich Company’s Christmas in July blog hop!  We are so glad that you joined us.  We hope that you will enjoy the tutorial each day and the projects on each of the blogs.  The blog hop will run 23-29 July, with a new tutorial and project each day of the hop.  Please note, if you are not a member of Speedy TV you will need to join the site before you can view the tutorials.  Joining is quick, easy and FREE, just click the tutorial link below and it will take you right to the home page where you can join.  The sign up button is on the right hand side of the page.

    Monday July 23rd —Christmas Cards in a Gift Box
    Tuesday July 24th —Stocking Stuffers
    Wednesday July 25th—Gift Bag
    Thursday July 26th—Gift Card Holder
    Friday July 27th —Ornament with Shrinky Dink
    Saturday July 28th —Glass Block
    Sunday July 29th —Decorated Tissue Box

Below are the designers participating in the hop. Some may have a tutorial or project each day, and some may not.


I love making my own stocking stuffers since it not only saves money, but also adds a personal touch to the gifts inside the stocking instead of just shoving candy inside.

One of the stocking gifts I'll be giving this year is bookmarks.  My daughter, and a couple of in-laws, are avid readers so bookmarks are always a great gift to receive, especially if you know someone who's still in school; including college.  They're always needed it seems.  I found some plastic bookmark holders online a couple of years ago for next to nothing and bought 100 of them, with the white glossy inserts, to personalize and use for years to come. 

After stamping my images from Christmas Cardinals in memento tuxedo black ink, and letting the ink dry, I colored the cardinals with prismacolor markers before over stamping the music sheet from Christmas Music in Tim Holtz brushed corduroy ink and then adding the sayings.  My final touches before sliding the bookmark into the sleeves, were googlie eyes to the cardinals, and some vanilla ribbon tied to the top.

Here's a close up of one of the bookmarks.  They;re really simple to make and if you're not good at cutting your own, you can buy them pre-cut easily at any local supply store.

Another gift I'll be putting into the stockings this year is "dressed up" packs of pocket tissues.  They are an easy gift that everyone seems to need around the holidays since the cold and flu season is also during that time.


After I stamped my images on snow storm heavy card stock and colored with prismacolor markers, I layered the main image using scraps of red and green card stock before adding gold brads in the corners.  Then I stamped the music sheet from Christmas Music stamp set using Tim Holtz fired brick distress ink before wrapping the tissue pack and tying it off with a strip of sheer green/gold trimmed organdy ribbon and popping the main image up using pop up glue dots. Once everything was adhered, I added some Ranger Glossy Accents to the cardinal eyes and holly berries. Here is a close up of one of the completed packets:

Thanks for stopping by today.  Have a great day and don't forget to stop by the rest of the designers blogs to leave them some love.

Stamps:  MFP Christmas Cardinals, Christmas Music
Ink: Memento Tuxedo Black, Tim Holtz Fired Brick, Brushed Corduroy
Card Stock: MFP Snow Storm Heavy, Stampin Up! Real Red, Glorious Green, Bookmarks
Accessories: Prismacolor Markers, Brads, Bookmark Holders, Ribbon, Pop Up Glue Dots, Googlie Eyes, Ranger Glossy Accents

Sunday, July 22, 2012

Gift Cards & Box - Christmas In July Blog Hop

Welcome to Mark’s Finest Papers, a Heinrich Company’s Christmas in July blog hop!  We are so glad that you joined us.  We hope that you will enjoy the tutorial each day and the projects on each of the blogs.  The blog hop will run 23-29 July, with a new tutorial and project each day of the hop.  Please note, if you are not a member of Speedy TV you will need to join the site before you can view the tutorials.  Joining is quick, easy and FREE, just click the tutorial link below and it will take you right to the home page where you can join.  The sign up button is on the right hand side of the page.

    Monday July 23rd —Christmas Cards in a Gift Box
    Tuesday July 24th —Stocking Stuffers
    Wednesday July 25th—Gift Bag
    Thursday July 26th—Gift Card Holder
    Friday July 27th —Ornament with Shrinky Dink
    Saturday July 28th —Glass Block
    Sunday July 29th —Decorated Tissue Box

Below are the designers participating in the hop. Some may have a tutorial or project each day, and some may not.


For my project, I chose to use a cardboard pencil box from Michael's covered with green designer paper, die cuts, and using the Little Church mini stamp set received free with the purchase of 4 full sized stamp sets this month paired with Scenic Selections.

Once I had the church stamped in memento tuxedo black ink onto snow storm heavy card stock, I colored only the windows and roof using prismacolor markers before stamping my trees and birds from Scenic Selections and then stippling Tim Holtz tumbled glass distress ink around them for a "frosty sky".  After all of my stamping and layering was finished, I pulled out my Spellbinders poinsettia dies and cut one full poinsettia for the middle of the box lid, then ran all of the pieces through the paper crimper.  Next, I pulled out some K&Company die cuts, plus some Me And My Big Ideas chipboard pieces to help add some color/dimension to the lid.  Once everything was added, and I was happy with it, it was time to make the cards.


For my cards, I stamped the saying and cardinal/holly image from Christmas Cardinals in memento tuxedo black ink onto MFP snow storm smooth heavy card stock before coloring with prismacolor markers and layering.  The card itself was dry embossed using a cuttlebug ornament embossing fold with a big shot before punching some holly leaves and bows using two different Martha Stewart punches.  My only embellishments were some faux brads, mini gold pearl stickers and Ranger Glossy Accents on the eyes and berries for some added dimension.

Here's a close up of the completed set.

Thanks for stopping by today.  Have a great day and don't forget to stop by the rest of the participating designers blogs for inspiration and leave some love.

Stamps: MFP Christmas Cardinals, Little Church, Scenic Selections
Card Stock: MFP Snow Storm Smooth Heavy, Stampin Up! Real Red, Glorious Green, Michael's 12x12 Green Plain Designer Paper
Ink: Memento Tuxedo Black, Tim Holtz Tumbled Glass
Accessories: Prismacolor Markers, Pencil Box, Mini Gold Pearl Sticklers, Martha Stewart Punches (Holly Leaves and Bow), Ranger Glossy Accents, Spellbinders Poinsettia Dies,K&Co. Die Cuts, MAMBI Chipboard Pieces, Glue Dots,  Paper Crimper, Stipple Brush

Thursday, July 19, 2012

Hot & Spicy - Mark's Finest Papers Blog Hop Day 4

Welcome to Mark's Finest Papers a Heinrich Company's 
July Blog Hop! 

This month's New Stamp Set Releases are

Asian Delights Featured July 17
Wild and Free Featured July 18
Garden Art Featured July 19
Hot and Spicy Featured July 20


Please hop along with us! You have a chance to win one of the above stamp sets! Just comment on the following blogs (don't forget this one), each day for more chances to win! (You do NOT have to comment on all the blogs each day! The names are drawn randomly!) All four winners will be announced on July 23, 2012 on the Mark's Finest Papers blog. You can go back and comment if you missed a day. (HINT: The more you comment, the more chances you have to win and comments on the MFP blog count twice!) The deadline for commenting is 11PM EST on Friday July 20, 2012.
.

Now I just had way too much fun using today's featured set Hot and Spicy, so I'm showing two different projects for you: a clean-and-simple card plus another framed item.
First up is a card that took about 20minutes to make, mostly because of the couple of masks that were needed for the peppers.  The technique is called cascading images and it's really simple to do; it just looks hard.  I started out by stamping one of the chili peppers along the right side border, made & cut out a mask, then repeated with a pepper going the other way - moving the masks along the way.  Once my stamping was finished, I stamped my saying, highlighted it with prismacolor markers and my card was done.

My second project is perfect for the kitchen.  I took another $1 store frame, added a die cut frame, and stamped the chili pepper string into the middle before coloring the peppers and raffia with prismacolor markers.  For a little extra dimension, I added a couple of strips of raffia folded into bows before adding two cut out chili peppers over them.  In order to get the saying to fit inside the framed area, I cut the entire saying apar (very carefully I might add) and then reassembled it next to the string of chili peppers to make sure it fit just right before stamping.

Thanks for stopping by today.  Have a great day and make sure to stop by the rest of the design team blogs to leave some love for a chance to win today's featured set.   Also, join us next week for our Christmas In July Blog Hop for some more inspiration and gift ideas.

Stamps: MFP Hot & Spicy
Ink: Memento Tuxedo Black
Card Stock: MFP Snow Storm Smooth
Accessories: Prismacolor Markers, $1 Store Frame, Raffia, Glue Dots

Wednesday, July 18, 2012

Garden Art - Mark's Finest Papers Blog Hop Day 3

Welcome to Mark's Finest Papers a Heinrich Company's 
July Blog Hop! 
This month's New Stamp Set Releases are
Asian Delights Featured July 17
Wild and Free Featured July 18
Garden Art Featured July 19
Hot and Spicy Featured July 20

Please hop along with us! You have a chance to win one of the above stamp sets! Just comment on the following blogs (don't forget this one), each day for more chances to win! (You do NOT have to comment on all the blogs each day! The names are drawn randomly!) All four winners will be announced on July 23, 2012 on the Mark's Finest Papers blog. You can go back and comment if you missed a day. (HINT: The more you comment, the more chances you have to win and comments on the MFP blog count twice!) The deadline for commenting is 11PM EST on Friday July 20, 2012.
.

My project today features the new Garden Art set by Mark's Finest Papers, a Heinrich Company.  This set will become another favorite of mine since I love gnomes.  They remind me so much of my grandfather.  In fact, I still have the big gnome book he gave me over 30yrs ago and it is what inspired my design and coloring.

I started out by pulling out a frame I had bought at the dollar store several months ago and measured some snow storm smooth card stock to fit the frame before stamping all of my images in memento tuxedo black several times so I could pop some of them up later for added dimension.  My saying was stamped just below one edge of the frame before being colored with a copic spica pen and then several birds, grass and fences from Scenic Selections were added using different shades of memento ink.  Once all of the stamping was done, I pulled  out my prismacolor markers and got to work coloring all of the stamped images; including the ones stamped onto scrap paper before cutting all of the ones out I had planned on popping up.  After my stamping, coloring and cutting was complete, I lightly stippled Tim Holtz tumbled glass distress ink over and around the main images to fill in the sky before stippling Tim Holtz forest moss to help fill in the grass area.  Now it was time to pop all of the cut out images up.

Once I had finished popping up the cut out images at various layers of dimension, I die cut and punched several pieces of scrap card stock in order to make a "vine trellis" with flowers to add to the framed images using my sizzix dies and Martha Stewart punches.  After all of the die cutting and punching was finished, I ran all of the pieces through my dusty paper crimper before adding them to the frame using micro glue dots and Ranger Glossy Accents.  The final touches were adding some ice stickles to the flower centers, butterfly antenna and a Making Memories page pebble to the sunflower.  Here's a close up of all the dimension:

Thanks for stopping by today.  Have a great day and don't forget to stop by the rest of the design team blogs and leave some love for a chance to win today's featured set.  Also, join us next week for our Christmas In July Blog Hop for some more inspiration and gift ideas.

Stamps: MFP Garden Art, Scenic Selections
Card Stock: MFP Snow Storm Smooth, Scraps
Ink: Memento Tuxedo Black, Tim Holtz Tumbled Glass, Forest Moss
Accessories: Prismacolor Markers, Pop Dots, Micro Glue Dots, Ranger Glossy Accents, Copic Spica Pen, Ice Stickles, Big Shot, Sizzix Sizzlets, Martha Stewart Punches, Stipple Brushes, Making Memories Page Pebble

Tuesday, July 17, 2012

Wild & Free - Mark's Finest Papers Blog Hop Day 2

Welcome to Mark's Finest Papers a Heinrich Company's 
July Blog Hop! 
This month's New Stamp Set Releases are

Asian Delights Featured July 17
Wild and Free Featured July 18
Garden Art Featured July 19
Hot and Spicy Featured July 20


Please hop along with us! You have a chance to win one of the above stamp sets! Just comment on the following blogs (don't forget this one), each day for more chances to win! (You do NOT have to comment on all the blogs each day! The names are drawn randomly!) All four winners will be announced on July 23, 2012 on the Mark's Finest Papers blog. You can go back and comment if you missed a day. (HINT: The more you comment, the more chances you have to win and comments on the MFP blog count twice!) The deadline for commenting is 11PM EST on Friday July 20, 2012.
.

First, and foremost, I am so happy the African animal silhouette sets are back!! Today I am sharing a gift card wallet I made using the newest Mark's Finest Papers, a Heinrich Company silhouette stamp set Wild and Free. 

 
Once I had downloaded, printed off, and cut out my wallet template, I stamped my images in memento tuxedo black ink onto some recycled glossy photo paper before stippling poppy, summer sun and the following Tim Holtz inks: milled lavender, dusty concord, spiced marmalade, and wild honey.  After I was happy with the look of the stippling, I layered the main image onto poppy and black card stocks before adding Making Memories black baby brads.  The background is stamped using the zebra stripe with poppy ink.

For the inside of my wallet, I stamped several of the silhouette images in poppy ink and a couple of the sayings in memento tuxedo black ink.  The final touch was to tuck in a Starbucks gift card and add a velcro closure.

Thanks for stopping by today.  Have a great day and don't forget to stop by the rest of the design team blogs and leave some love for a chance to win today's set.


Stamps:  MFP Wild and Free
Ink: Memento Tuxedo Black, Stampin Up! Poppy, Summer Sun, Tim Holtz Milled Lavender, Concord Grape, Spiced Marmalade, Wild Honey
Card Stock: Stampin Up! Poppy, Black, Recycled Photo Paper
Accessories: Making Memories Brads, Stipple Brushes

Monday, July 16, 2012

Asian Delights - Mark's Finest Papers Blog Hop Day 1

Welcome to Mark's Finest Papers a Heinrich Company's 
                       July Blog Hop! 

This month's New Stamp Set Releases are
Asian Delights Featured July 17
Wild and Free Featured July 18
Garden Art Featured July 19
Hot and Spicy Featured July 20


Please hop along with us! You have a chance to win one of the above stamp sets! Just comment on the following blogs (don't forget this one), each day for more chances to win! (You do NOT have to comment on all the blogs each day! The names are drawn randomly!) All four winners will be announced on July 23, 2012 on the Mark's Finest Papers blog. You can go back and comment if you missed a day. (HINT: The more you comment, the more chances you have to win and comments on the MFP blog count twice!) The deadline for commenting is 11PM EST on Friday July 20, 2012.
.
Today, we are featuring the new set Asian Delights. I have to say I absolutely love this stamp set!!! When I first saw it, I had so many ideas for the blog hop, I had a hard time deciding what to do. However, I finally decided the best way to showcase this new set would be to frame it somehow and make some more home decor. I certainly hope you're not tired of my framed pieces.


I started out by stamping my main images in memento tuxedo black ink onto Mark's Finest Papers, a Heinrich Company snow storm smooth heavy card stock before coloring with prismacolor markers and stippling Tim Holtz tumbled glass distress ink around the images to help fill in all of the white spaces. Once that was done, I decided to stamp some extra cherry blossoms onto scrap snow storm smooth heavy card stock, color, cut out and then pop up along the edges of the frame using pop dots to add some extra dimension to the whole piece. After stippling some Tim Holtz tumbled glass distress ink around the geisha girls, I stamped one of the sayings and added a fan charm to finish my project off.

Thanks for stopping by today. Have a great day and don't forget to stop by the rest of the design team blogs for a chance to win today's featured set.


Stamps: MFP Asian Delights
Ink: Memento Tuxedo Black, Tim Holtz Tumbled Glass
Card Stock: MFP Snow Storm Smooth Heavy, Black, Pink
Accessories: Prismacolor Markers, $1 Store Frame, Pop Dots, Stipple Brush, Pop Up Glue Dot, Fan Charm

Moxie Fab Three Ways!

Hello everyone and welcome to another week.  Sorry about the delays between posts again, however, my migraines are starting to act up and give me fits.  Today I am sharing 3, that's right 3, cards I made for different Moxie Fab challenges.

The first one features Mark's Finest Papers, a Heinrich Company soon to be released set on Tuesday called Asian Delights and was made for the Moxie Fab Stamp It Cards Birthday challenge.  Before stamping my images, I pulled out my Basic Gray Kioshi designer paper and let the paper plus the designs choose my images and colors used.  So keeping that in mind, I stamped the cherry blossom twice in memento tuxedo black ink onto snow storm smooth heavy before coloring with prismacolor markers, then stippling Tim Holtz tumbled glass distress ink around the main image panel, layered then added some soft lavender brads from my stash.  The second cherry blossom I cut out and popped up on pop dots before adding yellow ice stickles for a little extra effect before adding olive gross grain ribbon from Michael's $1 bins with a gold flower clip and then stamping my "Happy Birthday" saying with "hope" from Asian Delights directly onto the designer paper in memento tuxedo black ink.

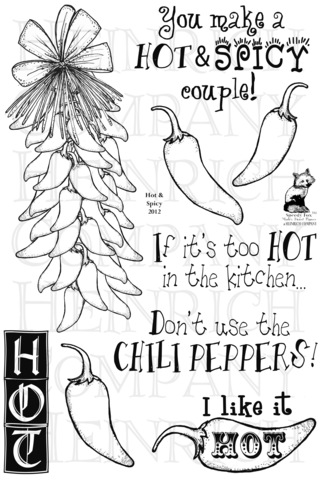
My second card features the soon to be release set on Tuesday called Hot and Spicy.  Gotta love those chili peppers!!  There's so much fun stuff that can be done with them.  This card is entered into the Moxie Fab Stamp It Cards Love challenge.  For this card, I went with a clean and simple design making the saying and my chili pepper couple the center of attention.  After stamping everything in memento tuxedo black ink onto MFP snow storm smooth heavy card stock, coloring my peppers with prismacolor markers and then layering, I added a couple of googlie eyes and a bow to give the peppers more "personality".  The only other embellishments I added was a sheer black organdy ribbon left over from last years Halloween cards, black baby brads, and then a single chili pepper in the lower right hand corner stamped in red as a last minute thought.

My third card features the new Above The Rest set and is entered in the Moxie Fab Stamp It Cards Hello challenge.  My image is stamped in memento tuxedo black ink onto MFP snow storm smooth heavy card stock with Tim Holtz tumbled glass and Adirondack caramel inks stippled around it.  After I had layered my main image, I decided last minute to stamp some grass and a bird from Scenic Selections in Tim Holtz forest moss distress ink before adhering my layered image to the card.  For a little extra effect, I die cut two sizzix flourishes to add next to my image with gold gem stickers highlighting the flourish ends.  The designer paper is from Michael's open stock I bought about 6 years ago knowing I would need it sometime - but 6 years later!  However, it fits perfectly!

Thanks for stopping by today.  Have a great day.

Stamps: MFP Above The Rest, Asian Delights, Hot and Spicy, Scenic Selections
Ink: Memento Tuxedo Black, Tim Holtz Tumbled Glass, Forest Moss, Adirondack Caramel
Card Stock: MFP Snow Storm Smooth Heavy, MFP Olive, Old World Gold, Groovin Grape, Strawberry Milkshake, Basic Gray Kioshi, Stampin Up! Real Red, Black, Michael's Open Stock Cracked
Accessories: Prismacolor Markers, Stipple Brushes, Sizzix Flourish Die, Big Shot, Olive Ribbon, Black Organdy Ribbon, Clip, Ranger Glossy Accents, Googlie Eyes, Black Marker, Gold Gem Stickers, Brads

Tuesday, July 10, 2012

Changing Zebra Stripes

Hello and welcome.  Today I am sharing another baby card I've made for the Moxie Fab Stamp It Cards Congratulations challenge.

I started out by downloading the dress pattern from Paper Crafts Magazine's 365 Cards and printing it out onto white card stock before cutting out the patterns and taping them to some retired Stampin Up! designer paper and blushing bride card stock.  Once I had my card patterns cut out, I sponged blushing bride around the edges of the card before stamping the saying from Mark's Finest Papers, a Heinrich Company soon to be released stamp set called Zebra Fun directly onto the dress apron.  Then I took the main image from the set and stamped it onto a scrap piece of designer paper before cutting it out and adhering it into the center of the dress after cutting the "mane" and curling it for added dimension.  On the inside, I stamped my Congrats saying in memento tuxedo black from the soon to be released MFP set Above The Rest.

The only embellishments I added some apricot prima daisies with baby pink rose centers and a pink gingham bow. 

Thanks for stopping by today.  Have a great day.

Stamps: MFP Zebra Fun
Ink: Memento Tuxedo Black, Stampin Up! Blushing Bride
Card Stock: Stampin Up! Blushing Bride, Retired Designer Paper, White
Accessories: Sponge, Primas, Glue Dots, Baby Roses, Gingham Bow, Martha Stewart Fringe Scissors

Saturday, July 7, 2012

Live The Adventure!

Hello and welcome to a very HOT weekend!!  It seems the only cool place is the California coastline right at the beaches, otherwise, it's air conditioner time.

Today I am sharing another card I made for the Moxie Fab Stamp it Cards Congrats challenge.  For this entry, I chose to go with a baby theme and used a MTME One-sie© template for my card before stippling Tim Holtz tumbled glass and broken china distress inks over the card and along the edges.

I stamped the main image from Mark's Finest Papers, a Heinrich Company set being released in two weeks called Above The Rest in memento tuxedo black ink onto some retired Stampin Up! designer paper, cut it out, and adhered to the center of the card.  Then I stamped the zebra and second part of the saying from Wild & Free in memento tuxedo black ink directly onto the One-sie© and then stamped the "Live" from Above The Rest  in Tim Holtz chipped sapphire after cutting it off from another saying in the set.  My only embellishment was some Making Memories mini silver button brads along the bottom.  Then it was onto the inside.

The inside of my One-sie© I kept very simple.  The saying was stamped in memento tuxedo black and the two images from Wild & Free were stamped in Tim Holtz broken china to help tie the whole "adventure" theme together.  I'm very happy with the way this card turned out since I made it while battling another nasty migraine and it was either stamp or cry from the pain - so stamping won.

Thanks for stopping by today.  Have a great weekend.

Stamps: MFP Above The Rest, Wild & Free
Ink: Memento Tuxedo Black, Tim Holtz Broken China, Chipped Sapphire, Tumbled Glass
Card Stock: MFP Snow Storm Smooth, Stampin Up! Designer Paper (retired)
Accessories: MTME One-sie© Template, Making Memories Mini Silver Button Brads, Stipple Brushes, Printer, Computer

Monday, July 2, 2012

Just Married

Hello again.  Today I am sharing a card I made for the Moxie Fab Stamp It Cards Congrats challenge.  What better way to say "Congratulations" to someone than to someone who's getting married?  So that's the theme I went with and decided to go with a black/white color scheme for more of an elegant feel.

I started out by stamping my church image from the Little Church special set for this month's release, in memento tuxedo black onto Mark's Finest Paper's, a Heinrich Company snow storm smooth heavy card stock then colored with prismacolor markers before using a copic spica pen to highlight the steeple cross.  Once my coloring was finished, I cut out the church and layered it onto a piece of black linen card stock continuing the black/white theme with my layers before adding some white Making Memories baby brads.  The same was done for my "just married" saying plus the layers.

Once the image and saying were all layered plus the brads attached, I took a piece of snow storm smooth heavy card stock and ran it through my big shot along with a cuttlebug divine swirl embossing folder before adding it to the card along with two Recollections paper flowers from Michaels with a black pearl sticker center.

Thanks for stopping by today.  Have a great day.

Stamps: MFP Little Church
Ink: Memento Tuxedo Black
Card Stock: MFP Snow Storm Smooth Heavy, Black Linen
Accessories: Prismacolor Markers, Copic Spica Pen, Recollections Paper Flowers, Glue Dots, Black Pearl Sticker, Making Memories Brads, Cuttlebug Divine Swirl Embossing Folder, Big Shot

Poppy Thanks

Second post for me today.  If you're looking for my Moxie Fab Stamp It Cards Love post, please scroll down one.

Can you tell I just love this new Welcome Poppies set by Mark's Finest Papers, a Heinrich Company?  Today I am sharing a card I made for the Moxie Fab Stamp It Cards Thank You challenge.

I decided to go with an elegant black/red theme for this one so I started out by stamping my own background using the small poppy and one of the sayings combined with some Stampin Up! poppy ink plus card stock.  Once my background was finished, I stamped my main image onto Mark's Finest Papers, a Heinrich Company snow storm smooth card stock in memento tuxedo black ink before coloring with prismacolor markers.  After my coloring was done, I lightly stippled Tim Holtz tumbled glass distress ink around the edges, layered and added only some Making Memories black baby brads as embellishments.

Thanks for stopping by today.  Have a great day.

Stamps: MFP Welcome Poppies
Ink: Memento Tuxedo Black, Stampin Up! Poppy, Tim Holtz Tumbled Glass
Card Stock: MFP Snow Storm Smooth, Stampin Up! Poppy, Black
Accessories: Prismacolor Markers, Stipple Brush, Making Memories Baby Brads

Poppies and Love

Hello all.  Sorry about the gap between posts, I have been recovering from a nasty 3 week migraine.  Ugh!!  Today I am sharing a card I made for the Moxie Fab Stamp It Love challenge.

I started out by stamping my background using the small poppy from Mark's Finest Papers, a Heinrich Company new Welcome Poppies set and stamping it in Stampin Up! razzleberry ink onto razmataz berry to create a background frame before stamping my main image onto white storm heavy card stock in memento tuxedo black ink and coloring with prismacolor markers.  I then stamped a couple of extra smaller poppies onto scrap card stock, colored, and set aside to cut out and pop up later.  Once my coloring was finished, I lightly stippled Tim Holtz tumbled glass ink around the edges, layered, and added some mini brads before adding my cut out poppies using pop dots.  The final embellishment was some black ice stickles to the poppy centers and some satin Stampin Up! ribbon.

Thanks for stopping by today.  Have a great day.

Stamps: MFP Welcome Poppies
Ink: Memento Tuxedo Black, Tim Holtz Tumbled Glass, Stampin Up! Razzleberry
Card Stock: All MFP
Accessories: Prismacolor Markers, Pop Dots, Brads, Ribbon, Stipple Brush, Black Ice Stickles, Glue Dots